

Monday 28 July 2014


Friday 11 July 2014
Best-Buy VS. Buh-Bye: LIQUID EYELINER

Liquid liners are the easiest way to create a quick and easy cat eye flick, or just to create some definition. My two main issues with eyeliner is that it's difficult to find one that's both easy to apply and black enough with a good formula! Here are my best and worst picks for liquid liners..

BEST BUYS:
the best...
1. Wet n' Wild H2O proof liner
This is by far the best eyeliner I have ever tried. And for €4.50 it's pretty cheap too! I got mine in 'ultra black' - which is exactly what it is. It was definitely the blackest out of any of the eyeliners. I like the formula and sponge applicator as it's really easy to use! Not to mention that it lasted so much better than the others.. Even after having a bath it's still on my skin!

After the bath..

2. BENEFIT MAGIC INK
While I may not have this in my curren collection, I have tried this before and it is a great liner! Can't really work the applicator as it is a brush and not stiff enough but the formula is great

3. CATRICE EYELINERS - ALL OF THEM!
There hasn't been one Catrice eyeliner that I haven't liked! They all have great formulas and applicators, as well as being so cheap! Their pen is even better than the Eyeko one :) Again, I have none in my collection right now cause I've been trying to try out different brands - but from now I'm going to stick to Wet n' Wild or Catrice
BUH-BYE
And the worst!
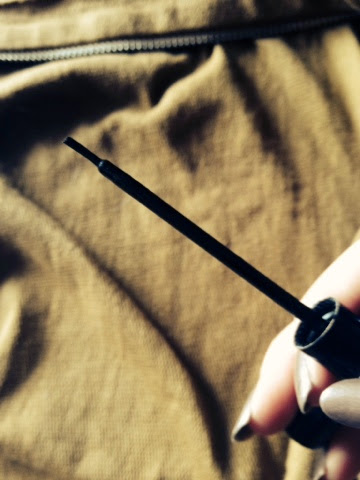
1. MAYBELLINE MASTER DUO

By far the worst eyeliner I have ever tried. It seemed really unique - having an applicator that could be used to apply both thin and thick liner. However, the applicator was plain weird and difficult to use ( a flat circle) so I decided to cut it off, but it still didn't look good. It doesn't apply well at all, it's streaky and has such a thin consisitancy. Didn't like this one bit!

For an eyeliner represented by cat-eye flick Queen Alexa Chung, you would think that this €16 liner would be a God send... But no, it really isn't worth the hype. I found it drying, and really difficult to line near my lashes. So many cheaper, better alternatives!
3. ESSENCE
While the pigmentation is good, and it is quite easy to apply - the colour just isn't right! I want a jet black liner - this looks more navy (especially compared to the others.) Also, hairs on the brush started to stick out - I cut them off, but still made application harder. Not bad for it's price point - but again, go for Catrice or Wet n' Wild instead!

1. Essence, 2. Eyeko, 3. Maybeline, 4. Wet n wild
And here's how they held up after washing my hands!

Monday 30 June 2014
June Favourites <3

I never got around to doing a May Favourites last month, so I have a good few things to talk about this month! Here's a list of what I've been loving for the month of June.
1. URBAN DECAY ELECTRIC PALETTE


I used to be a huge fan of colour when it came to eyeshadows. My everyday eye look in school was a purple or blue smokey eye, but I became very boring when it came to eye makeup and was wary of wearing bright colours. However, when UD released their electric palette, I NEEDED to get my hands on it, and I'm glad I did! The pigmentation is incredible, and the colours are so much more vibrant in real life. My favourites have been 'slowburn', 'thrash' and 'gonzo'. They can be used for a hint of colour on your crease or the inside of your eyes. Once blended with a neutral shade, they are completely wearable! I heard complaints that the shadows stain your eyelids, but I always use a primer base and haven't experienced any form of staining!
2. MAC MINERALIZE SKINFINISH IN 'SOFT AND GENTLE'

3. BOURJOIS BRONZING PRIMER

I am in love with this primer. Worn alone, it is lovely and creates a smooth, even base for a natural tan complexion. Under foundation - it's perfect for adding a healthy glow and also great if your foundation is a little paler than your current one and you don't want to buy another! And the smell... Wow. It smells like chocolate!! So good. It's a mousse consistency which is easy to apply and smooth on the skin. I dot a small amount into my face and spread it using a duo-fibre foundation brush before applying foundation. It can also be used for contouring as it acts as a bronzer!
4. CLINIQUE ANTI-REDNESS CLEANSER
This cleanser literally melts away all your make-up, and leaves your skin feeling soft as it is a cleanser and not only a makeup remover. Also, it helps big time with any redness in your skin!
5. CLARINS RADIANCE-PLUS GOLDEN GLOW BOOSTER
As I am beyond pale, I like to use the garnier summer body gradual tan moisturiser. However, as I am so into my skincare, I refuse to apply that or any tan on my face as I don't want to clog pores. Which is why this has been my new best friend! All you have to do is add 2-3 drops into your normal moisturiser and voila - a lovey tan on your face. No more tan body, white face for me!
6. L'OREAL SKIN PERFECTION SERUM
I hate having such an even skin-tone, so I wanted to get a serum that would help the tomorrow but that was also purse friendly. I've been using this serum twice a day, before my moisturiser, and I have seen a big difference in my skin's tone and texture.

SCANDELEYES EYELINER
These eyeliners are amazing. A complete dupe for the UD 24/7 glide on, works so well on the waterline. I've been loving the colour 'bronze' this month in particular.
APOCOLIPS LIP LAQUER
The pigmentation of a lipstick, but a glossy finish - I am in love with these lip laquers. My favourite is the colour 'big bang' which is the perfect red colour. Even though I despise the packaging, the product is pretty amazing! Here's a photo of how it looks on.

Sunday 22 June 2014
Heat proof make-up that lasts!

STEP 1: PRIMERS
Both face and eye primers are essential for both creating a base, as well as giving your make-up something to adhere to. Personally, I think primers are essential regardless of weather, but it is even more important in the Summer. My two favourite primers are the Nars oil free pore refining face primer, and the Urban Decay eye primer potion. Both are pricey, but last well and make a huge difference to your make-up routine. I recently bought the Mac prep and prime lip primer and also notice a huge difference when using lipstick!
STEP 2: LOOSE POWDER BEFORE FOUNDATION
Using a loose powder before your foundation not only fills your pores, but also decreases oiliness. It is also a great way of creating a full coverage face without heavy foundation! I use the Catrice loose powder and it works perfectly for me.
STEP 3: APPLY FOUNDATION WITH A SPONGE
The Real Techniques sponge has been my new best friend. I can't go back to using a brush! It creates the most natural look, without looking caked - which is essential in the heat because you can't have heavy make-up or it will just look greasy.
STEP 4: BLOT!
Use either blotting paper or even a ply of tissue paper to remove all the excess oil from your foundation by simply patting it all over the face. This trick works wonders and you will notice a decrease in oiliness throughout the day!
STEP 5: GEL EYELINER
Gel eyeliner will last for hours on end and will not budge! I use the Maybelline lasting drama gel pen. I wore it the day of my flight (which was late that night) and after 21 hours it was still perfect - no touch ups needed!
STEP 6: BROW MASCARA
No matter what you use on your brows, you need to set it with a brow gel or mascara to keep those hairs in place. Benefit's 'gimme brow' is amazing, but so is the Maybelline version! - a brow essential.
STEP 7: SETTING SPRAY
A few sprits of a setting spray will ensure that your finished make-up look will last. I use the Urban Decay All Nighter spray for days when I'm working or when I'm going out. It is product must for me!
Wednesday 28 May 2014
THE PERFECT BROW: My Go To Products


STEP 1: I brush my brows using the Anastasia 'Brow Wiz' in ash blonde. This is a wax pencil one end - which is exactly like the mac wax pencils!- and a spool the other end for brushing your brows. I'm glad I bought this pencil purely for the brow! Since the actual wax is just like the Mac one I'll probably just stick to buying that one as they are the same price but you would have to pay more for the Anastasia one to ship from the UK!

STEP 2: Using a thin, angled brush I use the Anastasia 'Dipbrow pomade' in blonde to draw my eyebrow shape. Can I just say how much I'm in love with this pomade!? I don't know what my life was before it - definitely worth the hype! Not only is it perfect for creating a great shape for under and over the brow - but it lasts so well! I put this on in the morning and could be at work all day (under spotlights) and it's still in perfect condition. It was £15, so around €18, and I have to say it is worth every penny. There is a lot of product so I have feeling it will last me a long time!

STEP 3: I then fill in my brows using a powder from the HD eyebrow palette in Vamp. Even though Vamp is the darkest of the palettes, it has the perfect ashy dark blonde for my eyebrows! Unfortunately shortly after I bought the product (like 20 minutes!!) it smashed in my handbag and this is actually the only colour I have left! It is the bottom left hand shade. To be honest: I wouldn't advise buying the palette because it broke so easily for me - and the company refused to replace it for me! For the price that is was (€30) that was not okay... so I would say find a cheaper alternative like the essence or wet n' wild sets - they're very cheap - around €3 each - and does just fine!

Sometimes I use my wax pencil instead of powder - it depends on the day!
STEP 4: Finally, I set my brows with the Maybelline 'Brow Drama' mascara in medium brown. Alone, this mascara is brilliant for filling in your brows - but I always use it to set mine because my eyebrow hairs like to fall down! This mascara is great - one coat and your eyebrows won't move! It's matte also so won't give any sheen to your brows. It's a great dupe for the Benefit's 'Gimme Brow'.

So that's how I get my eyebrows looking their best. My must have eyebrow products have to be the Anastasia Pomade and the Maybelline brow mascara, so if you need new eyebrow products you need to get those because I swear by them! My new make-up staples.
Emma x
Friday 16 May 2014
SAMPLES: How to avoid 'disappointing products'

Benefit goodies

Benefit are great for giving samples of their products. They always come in miniature versions and are commonly given with purchases and with magazines! Unfortunately, none of these worked out for me, and I won't be purchasing any of them.
1.'Cha-Cha' lip tint
While I love the choral shade, this just did not work for me as it sticks to every piece of dry skin on your lips! Just awful.
2. 'Triple Performing' moisturiser
I don't have anything particularly negative to say about this product - it was okay, but there are so many moisturisers for the same price or less that work better! Not worth the price tag.
3. 'Fake-Up Concealer
Again, nothing particularly bad but nothing wow. Plenty of drug store products give the same results!
4. 'HELLO FLAWLESS Oxygen wow' foundation
This foundation was awful on me - it is far too greasy for my combination skin - but it would be lovely on dry skin, so if you have that skin type give it a go! Also, the sample was way too dark for me. However, I've started using it for contouring so it is being put to use.
All About the Face

3 face products - all in lovely packaging may I add! This is the best way to get a sample (for free!!) Simply bring a few plastic containers with you a put a bit of product into them so you can try them at home properly!
1. Seventeen 'WOW tan liquid glow'
I was a bit apprehensive to buy this product because I was afraid it would be orange and sparkly on so I decided to take a sample home - and now I cannot wait to buy it! This stuff is amazing. It's a lovely highlighter for when you have tan on and it gives a lovely glow to the face. And its only €7.59 at Boots! Seventeen also have a non-tan highlighter which I'm going to try out next. Boots also have 3 for 2 on Seventeen cosmetics at the moment.

2. La Roche Posay 'Rosiliac CC cream'
Before, I never bothered with CC creams until I came across this one from La Roche Posay. What really interested me was that it is primarily to counter-act redness (my biggest skin problem) as well as having an SPF of 30! Alone, its perfect for light coverage on those 'no make-up' kinda days. If I'm wearing a full face of make-up, I've started to use it on my cheeks where I tend to go very red. Avoid any greasy areas as it will cause any foundation to slide off and can look very oily. I'm definitely going to be buying this! You can buy it Boots for €22.99 but you can get cheaper ones in selected pharmacies!

3. MAKE UP FOREVER 'HD foundation'
This product had been hyped up so much, I needed to try it. The make-up artist in store gave me a sample of the foundation in shade '2'. When I tried it on it seemed okay - no better than any other foundation, but after a few hours it was so greasy! And this was the more matte foundation! It was horrible how oily my skin looked. I really just did not see what the hype was about - especially seeing as it has a hefty price tag!
4. Bare Minerals Ready SPF 20 Foundation
I actually got this sample over a year ago, and I still have some left! It even came with a miniature Kabuki brush which is perfect for small areas like around the nose. I fell in love with it from the first use. It was perfect for covering up any shine and gave a lovely finish. The minerals didn't work well when I applied it directly onto my skin as it tended to clump, so I was using it as a powder! I am definitely going to be going back to Bare Minerals to buy myself one! They're usually around the €20 mark so not too pricey - but definitely worth it.

Moral of the story: if you're uncertain - get a sample! :)
Emma x
Friday 2 May 2014
DIY Beauty Treatments

I am a firm believer in DIY beauty products. While some products can't be mimicked, there is plenty you can can replace with items from you kitchen! I have tried and tested tonnes of DIY beauty treatments (I've even put egg in my hair - never again!) and I wanted to share with you all what I have found to be the best!
1. PORE MINIMISING FACE MASK
Ingredients: 1 egg white, 1 teaspoon of lemon juice
Method : 1. Mix egg white and lemon juice in a bowl
2. Apply onto face using hand or any old facial brush
3. Leave for 5-10 minutes
4. Wash off using cold water and pat skin dry
5. Moisturise
Result: Tighter, smoother, radiant skin.
2. HAIR TREATMENT MASK
Ingredients: Coconut/ olive oil, regular conditioner
Method: 1. Mix either coconut or olive with your regular conditioner in a bowl
2. Apply to to hair (do not put on roots or you well get greasy hair)
3. Leave for as long as possible, overnight is best, and wash out with warm water
Result: Soft, frizz free hair
3. BROW AND EYELASH GROWING SERUM
Ingredients: Castor oil, coconut oil, avocado oil
Method: 1. Mix the three oils into an empty bottle (you can buy sets of empty travel-sized bottles in Pennys)
2. Shake bottle until mixed well
3. Using disposable brush wands, dip into the oil and apply to eyelashes as if you were applying mascara, and brush through eyebrows
4. Repeat nightly before going to bed
Result: Longer, thicker eyelashes and eyebrows
4. HONEY LIP SCRUB
Ingredients: Brown sugar, honey, olive oil
Method: 1. Mix the three ingredients into a small empty bottle or jar
2. Apply to wet lips
3. Scrub in a circular motion
4. Wipe off scrub with water or towel
5. Apply lip balm
Result: soft, chapped-free lips
5. BLACKHEAD REMOVER STRIPS
Ingredients: Unflavoured gelatin, milk
Method: 1. Mix a small amount of milk and liquid gelatin in to a bowl
2. Apply over nose area evenly
3. Leave until mixture hardens on skin
4. Peel off like normal blackhead remover strip
5. Splash face with cold water
6. Moisturise
Result: Blackhead free skin!
Tuesday 29 April 2014
April Favourites

This Month I have tried a number of products; here are my favourites, which are all under a tenner!
1. GARNIER'S 'SUMMER BODY' GRADUAL TAN MOISTURISER
I have tried every single gradual tan moisturiser made, and this one is by far my favourite. It's easy to apply, and doesn't cause any streaks! The best part is the smell, as it has a hint of apricot. It's not only a great moisturiser, but also creates a great tan from the first use. It is currently on promotion for €5 at Boots!

2. PRO:VOKE 'TOUCH OF SILVER' SHAMPOO
Okay so this is really only for the blonde girls. I started using this when I had really light blonde hair during the summer as it was great for keeping that 'white' tone. However, I've started using it again as my hair has started to get quite brassy, which is exactly what this product is for! It may say that it's for white, grey and platinum blonde hair, but if you have any shade of blonde it works just the same! It's only €4 at Boots, which is good seeing as you only use it once- twice a week depending on how blonde you're hair is. (I only use it once a week.) It completely changes the tone of your hair from the first wash - I've been getting so many people asking if I have dyed my hair!

3. MAYBELLINE'S 'BROW DRAMA' BROW MASCARA
For ages, I've been on the look out for a 'brow mascara' to keep my brows in place. This one was on promotion in a local pharmacy so I decided to give it a go, which I'm glad I did as it is perfect for not only keeping your eyebrows in place, but also creating a hair effect that thickens your brows. I have yet to use it by itself, I usually just use it after I fill in brows, but I can imagine it'll be very handy just by itself! I got it for €5, but it is usually around the €8 marks!
4. COLLECTIONS ' LASTING PERFECTION' CONCEALER
I've seen so many Youtubers rave about this concealer so I had to try it myself, and I have to say I can't fault it. It has great coverage, yet it isn't heavy. I got mine in the shade 'cool medium' 2. While the packaging may not be the nicest (the writing is fading already!), for €6 you really can't go wrong!
5. MAYBELLINE'S 'COLOUR SENSATIONAL SHINE' LIPGLOSS
I am loving this lipgloss right now. I got it in the shade '420 glorious grapefruit' which is a lovely chorally pink colour. I've finally managed to find a long lasting lipgloss that isn't sticky! This is the first colour I've tried but I'm definitely going to start building up a collection. The price varies on where you buy it but it is generally cheap; I got mine for €7!
6. RIMMEL'S GEL EYELINER
I can't go a day without using eyeliner to create a 'cat eye flick', but I usually tend to use liquids. I got fed up as the didn't give a great finish and tended to flake, so I decided to try out a gel. This gel is new from Rimmel, and I absolutely love it! For €9 you get both the pot of gel, as well as a brush to apply the gel - which is great and so easy to use! I was surprised at how easy it was to apply as gel has a rep for being difficult to use. I've been using it every day and haven't found the need to re-touch it - it doesn't budge!

7. 'COCOWEL' ORGANIC EXTRA VIRGIN COCONUT OIL
Last on my list is coconut oil; which has a million and one benefits! My mam bought this recently from Dunnes Stores for cooking ( I think it was around €6) but I've been using it for my hair! It is 100% pure, and comes in solid form. To use on your hair scoop a table spoon into a bowl and heat until a hot liquid - hot oils are better for your hair - and apply it all over, especially at the ends. I usually tie my hair in a bun for a few hours and wash it out later that day. It's great for strengthening your hair and giving it a natural shine. If you have leftovers, coconut oil is great for both your skin and for eyebrow growth! I swear by it for so many uses!

Tuesday 22 April 2014
Review: Benefit's 'Agent Zero Shine' powder

One of my biggest problems make-up wise is having an oily t-zone. Between working under spot-lights and long days in college, I need a good compact powder to control the shine. I used to think that all powder was the same, and they all did the same job: to remove oil, but I was so wrong! I was using just a cheap catrice powder, which I found a bit useless as I needed to apply it frequently. Eventually, I gave in and thought I'd try the new Benefit 'The Porefessional: Agent Zero Shine', and so far it's been working wonders!
At €33.50, it wasn't cheap, but when you take into consideration that it lasts about 3-4 months, and comes with it's own brush it doesn't seem so bad!
You can choose what quantity of powder you need, as you have to tap it into the lid; which means no waste! The brush is great also; very soft and is easy to use.

Results wise, I've no complaints. The powder really does control shine, both when I'm at work and when I'm out. (For the first time ever I didn't wake up after a night out to see photos of me with a greasy face!) The best part is it doesn't 'clump' your foundation, and leave those annoying little dots where the powder was applied, which is a big plus for me as they are one of my biggest make-up faux pas! So far, it is the best setting powder I've used and I'm happy with the results!
Emma x
Wednesday 16 April 2014
My Favourite Foundations
Finding the perfect foundation is a hard task ; there are so many to choose from, and can be a bit over-whelming. I've tried so many foundations over the years, and I've found my go-to brands. Varying in price from €4 to €40, there's a foundation listed for all budgets. Bare in mind I have combination skin, and like a medium-heavy coverage, depending on the occasion. Also, I'm a fan of dewy, illuminating foundations, so you won't find any matte ones here! If you need a foundation that ticks all of those boxes; keep reading.


1. Nars 'Sheer Glow'
My all time favourite foundation, hands down. I've tried to branch out to other brands but I keep coming back to Nars. I use the shade 'Sante fe' which is great whether you've a light tan (say from moisturizers) or full on tan as it is buildable and adapts to your skin tone. The coverage is perfect; it hides all your blemishes, without looking heavy or caked on. It feels light on your skin, and isn't bad for your pores as it is loaded with anti-oxidents. It leaves your skin soft and radiant even after removing. At €40, it is the most expensive foundation on my list, but it is so worth the money. It lasts forever; I am currently on my second bottle, and I bought the first one in November 2012!
2. Mac 'Studio Fix Fluid'
At €31.50 Studio Fix is a decent price for a going out foundation; but that is all I would use it for! It is not suitable for everyday foundation as it is heavy, and can cause break-outs. However, for a night-time foundation it is perfect! Heavy coverage which covers all blemishes, not to mention that it lasts on your skin, with little touch-ups needed.
3. L'Oreal 'Lumi Magique'
Similar results to Nars Sheer Glow but only a fraction of the price! The price varies depending on where you buy it, but it is usually around the €14 mark! This foundation is perfect for daytime. It leaves your skin looking natural and dewy.
4. Essence 'Stay all day'
I know what you're thinking; Essence.. Really? Yes, really. I started using this foundation back in 6th year, and at €4 I was very surprised at how well it worked!
While it may have a strong smell, I actually like it, it reminds me of the days when I wore it. It's not quite dewy or matte, more like a happy medium. It genuinely did last on my skin, and had great coverage! Not too shabby for a cheap foundation. 5. Rimmel's 'Wake me Up'
Perfect for every day wear. The coverage is quite light which can have it's advantages if you are wearing it to school/college/work as you don't want a heavy foundation clogging your pores! It leaves your skin dewy and radiant, which is perfect for early mornings or to hide a hungover face as it instantly 'wakes up' and illuminates your skin. Price varies, again depending on where you buy it, but it is usually around €11.
Emma x
Subscribe to:
Posts (Atom)